Overview
Roar Collab is Penn State’s High-Performance Computing (HPC) Cluster. In this post, I will lay out the basic tools needed to use it.
Here, I assume:
- You have already created an account and have access. Otherwise, follow the official documentation for instructions.
- Basic knowledge on Linux and using the comand line/bash shell. If not, check “Command Line Basics”.
For the remainder of this tutorial, I will refer to Roar Collab as Rcollab.
Rcollab can be used in two different modes: interactive and batch.
Interactive mode
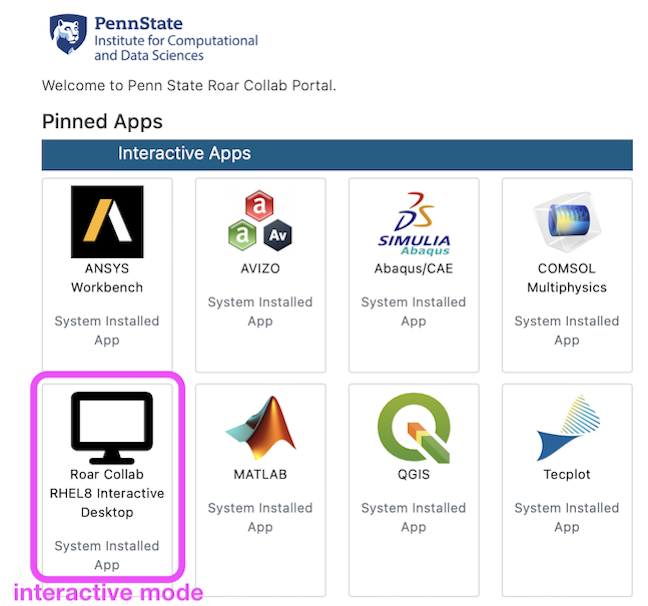
This mode uses the open OnDemand graphic user interface (GUI). This mode is meant to be used to develop codes/scripts and therfore has limited computing resources, i.e. fewer cores, limited ram per user, etc.
To connect:
- Log into http://rcportal.hpc.psu.edu
- Go to
Interactive Apps > Roar Collab RHEL8 Interactive Desktopor click on the link in the home dashboard.

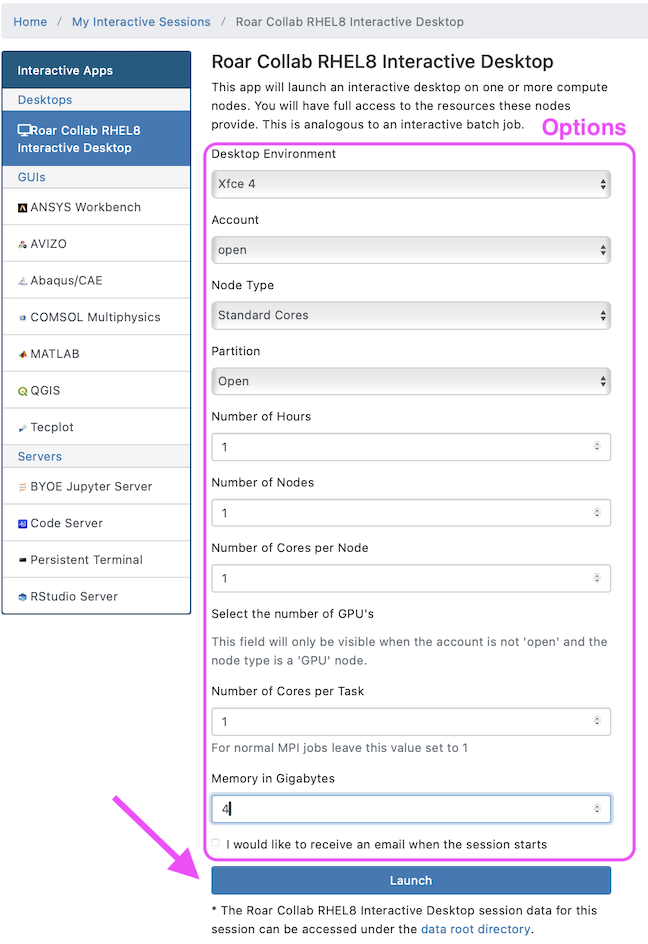
- Modify the options as needed (it’s ok to leave the default), and click
Launch.
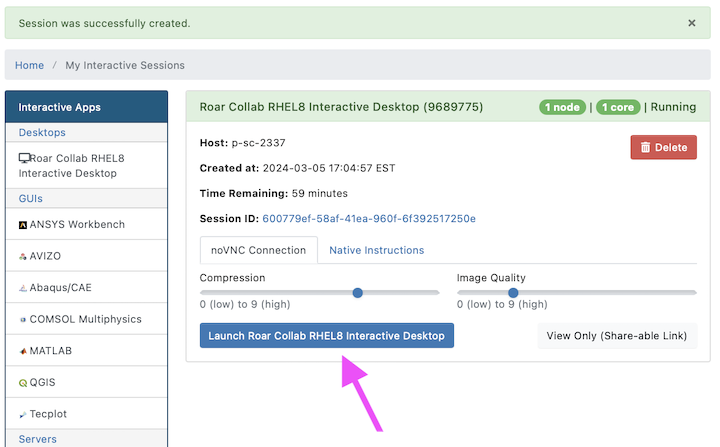
- You will see a green banner stating “Session successfully created”. Wait for a few minutes and access your interactive session once it starts running. Click on “LaunchRoar Collab RHEL8 Interactive Desktop”.

Batch mode
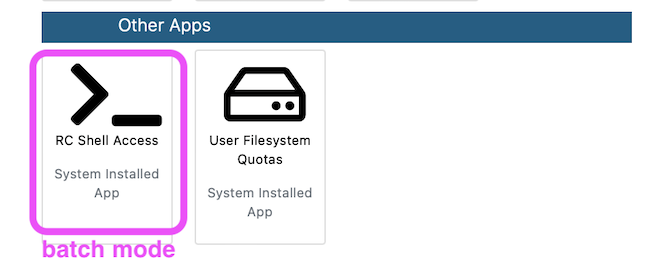
This mode doesn’t have a GUI, and is controlled via the command line. Computing jobs are submitted through this mode.
Once you have written and tested your code, you can submit it to the server via the batch interface. There are two ways to access Rcollab in batch mode.
Portal
- Log into http://rcportal.hpc.psu.edu
- Go to
Clusters > _RC Shell Accessor click on the link in the home dashboard.
Shell
- In a command line run
ssh <psuid>@submit.hpc.psu.edu
where you substitute <psuid> for your id. When prompted, input your password and follow the 2-factor authentication steps.
Using a shell to connect to Rcollab is often the fastest way.
Note: On a PSU computer, you can use a portable shell, like MobaXterm.
File Transfer
For transferring files to/from collab to the local machine, type the following in your local machine’s terminal
from PC to Rcollab
scp -r <pathto/localfile> <YOUR-PSU-ID>@submit.Rcollab.ics.psu.edu:</destination/path/>
from Rcollab to PC
scp -r <YOUR-PSU-ID>@submit.Rcollab.ics.psu.edu:<pathto/acifile> </localdestination/path/>
Libraries and Software (Modules)
Rcollab has a wide variety of modules (software and libraries) already installed. Some software like Matlab, RStudio and Jupyter are available as interactive desktops, but in the majority of cases, if you want to use the software, you need to launch it from the shell. Below I show how to load Stata
To search for a module use
module spider <module-name>
Load Example: Stata
Now suppose you want to load Stata, first, you import a specific set of modules by running
module load stata/18
xstata-se
The first line loads the module and the second launches Stata’s GUI. The se part is for the SE version which can handle large datasets. there is also the IC (standard) version or the MP multi-processor version.
For loading Stata in the command line simply do
stata-se
Note: In order to use the GUI you must log in via Exceed onDemand.
Check if a library is installed
ldconfig -p | grep <TheLibraryYouLookFor>
Wrapping Up
That’s it. You’re now well-versed in the basics of accessing Roar Collab.
For a hands-on guide on executing code in Roar Collab, have a look at “Submitting your First Job to Roar Collab”.
Finally, to ensure smooth and secure operations, you can learn to set up password-less ACI authentication by checking out “SSH Keys: A Guide to Remote Server Access”. Enjoy 🤓